Getting started in wildlife photograhy: Tips, Techniques & Ethics
taking Your first pro-level image of A wild animal in its natural environment is an incredibly rewarding experience. This guide is for Photograpy beginners and wildlife enthusiasts who are interested in getting started in wildlife photography. I hope you’ll find the information helpful in capturing your first shots of the local wildlife in your area.
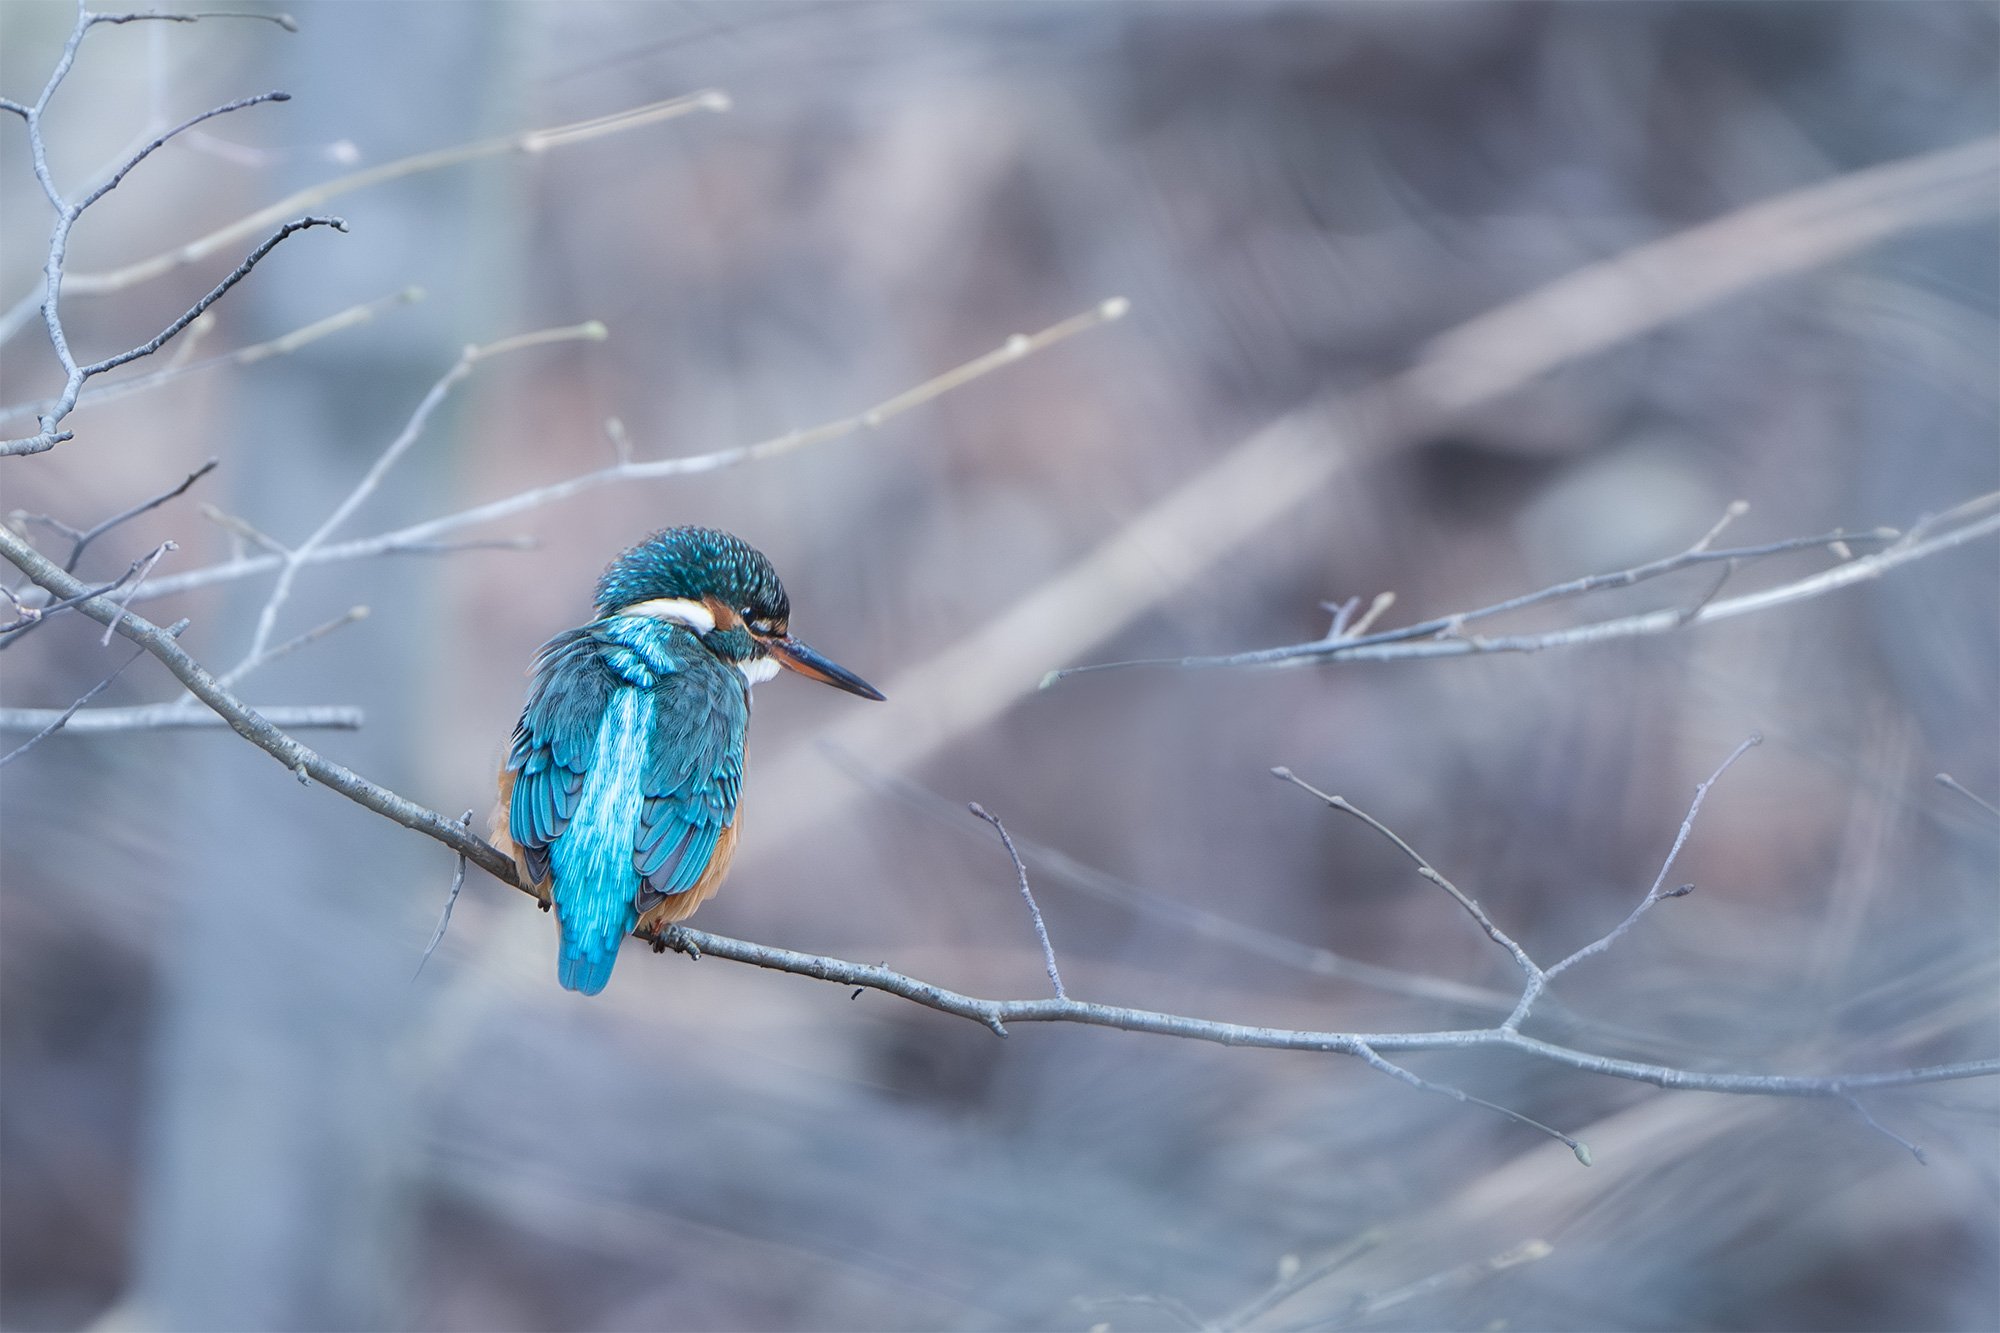
A female kingfisher (identifiable by the orange underside of the beak) perching between hunts in Prague, Czech Republic. Photograph: Matt Garnett, 2023
Getting started in wildlife photography
Wildlife photography is a branch of nature photography that aims to capture wild animals in their natural habitats. It often requires a lot of patience, and you might sometimes spend many hours waiting for the perfect shot. However, the thrill of taking your first wildlife photographs out in the field can be instantly rewarding and memorable.
Unlike photographing pets or animals in captivity such as in zoos or wildlife sanctuaries, wildlife photography focuses on the non-intrusive and ethical observation of animals in their natural habitat. You’ll discover how important these concepts are if you get to the point of submitting your own photographs into wildlife photography competitions, which have some of the strictest entry rules of any photography genre.
Different types of wildlife photography
Wildlife photography includes various categories, each offering a unique perspective on documenting nature. Here are some popular ones:
Bird photography: My personal passion, capturing birds within their natural environment requires high levels of patience and a good understanding of the capabilities or your camera gear. The results can be incredibly rewarding when you get that perfect shot of a bird in flight, or exhibiting courtship behaviours in early Spring, for example.
Macro wildlife photography: This involves getting close-up images of smaller creatures, like insects and amphibians, revealing the detailed beauty often missed by the naked eye.
Underwater wildlife photography: Brings to life the world under the sea, from colourful fish and crustaceans to larger marine mammals, and often requires scuba skills and specialised camera equipment.
Landscape wildlife photography: Also known as environmental portraiture, this involves wide-angle shots that emphasise the environment around your subject, creating a narrative context for the wildlife being photographed.
Wildlife photography tips for beginners
Starting out in wildlife photography can be challenging, but with the right strategies, patience, and practice, you’ll soon be capturing stunning images.
Understanding your gear
Before heading into the wild (or your back garden!) it's best to familiarise yourself with your camera, its settings, and features. Knowing how to quickly adjust settings like aperture, shutter speed, and ISO is crucial for capturing those fleeting wildlife moments. Here are some quick tips to help you get started:
Aperture: This setting controls the amount of light entering your camera and affects the depth of field of your photograph (put simply, how much of the scene in front of you is in focus). Wider apertures (lower f-numbers such as 1.8, 2.8, or 4) let in more light and create a shallow depth of field, which is great for isolating your subject by blurring the background. Narrower apertures (higher f-numbers like 8, 11, 16, etc.) increase the depth of field, which is useful for ensuring more of your scene is in focus, especially in wider landscape shots that include wildlife.
Shutter speed: This controls how long your camera's sensor is exposed to light. Fast shutter speeds (e.g., 1/1000s) are great for for freezing motion, which is particularly important when photographing fast-moving animals. For photographing small birds in flight, you may even need to use shutter speeds of 1/3000s or higher. Slower shutter speeds (e.g., 1/60s) can be used creatively to capture motion blur, which helps to convey movement and dynamism.
ISO: ISO is a topic that sometimes sounds complicated, but the principle is pretty straightforward. A lower ISO number (e.g., 100 or 200) is ideal for bright conditions and produces the least amount of image noise (the grainy texture on your image). However, wildlife photographers are often dealing with very low light conditions where these low ISO settings aren’t practical. Higher ISO settings (2000, 3000 or more) allow you to get a decent exposure in lower light conditions, but introduce more noise into your images.
Balancing ISO with aperture and shutter speed, know as the ‘exposure triangle’, is key to getting a well-exposed shot without too much noise. Nowadays, modern mirrorless cameras can handle very high ISO settings and still produce a useable image. On my Sony A7RIII, for example, I’m happy to go up to ISO 6000 or sometimes even higher without worrying too much about image noise.

A grey wagtail photographed at ISO 6000 with a shutter speed of 1/640s on my Sony A7RIII. The noise in this photograph adds to the ambience of the scene and doesn’t detract from the overall effectiveness of the image. Photograph: Matt Garnett, 2023.
If you’re trying to remove noise from your photos in Adobe Lightroom or Photoshop using noise reduction tools, be careful not to overdo things. Pushing these tools too far can create unnatural-looking results that feel artificial or lack detail.
If in doubt, it’s better to have a noisy photo that looks natural, rather than a ‘noise-free’ image which feels over-edited.
Autofocus (AF): Use autofocus for sharp images of quick-moving subjects. Continuous autofocus (also called AI Servo or AF-C mode depending on your brand of camera) is particularly useful for tracking moving subjects like flying birds or running mammals. This mode adjusts focus continually as the subject moves, helping you maintain sharpness.
Manual focus: While autofocus is helpful, manual focus is useful in certain scenarios, such as macro photography of small creatures or when your camera struggles to autofocus due to low contrast or obstructions like branches and undergrowth.
Focal lengths: Longer focal lengths (in general, between 300mm to 600mm) will help you photograph wildlife at a respectful distance, reducing your impact on their behaviour. As a bonus, these lenses also create a shallow depth of field, which helps to isolate your subject by blurring the background.
Minimising camera shake: Use stabilising equipment like tripods or monopods to minimise camera shake, especially when using long focal lengths or slower shutter speeds. Additionally, practice stable handholding techniques, such as bracing your elbows against your body and using a firm grip on the camera (but remember to press the shutter button gently).
Image stabilisation: If your lens or camera body has image stabilisation (IS), make sure to use it, especially in low light or when shooting handheld. This feature helps to reduce blur caused by camera movement.
Burst mode: Wildlife can be unpredictable, and sometimes the perfect moment lasts only a fraction of a second. Use your camera's burst mode (sometimes called continuous shooting mode) to capture a series of images in rapid succession. This increases your chances of getting a sharp, well-timed shot.
RAW format: Shooting in RAW format rather than JPEG gives you a lot more editing possibilities when you get back home. RAW files retain all the data captured by your camera’s sensor, giving you greater flexibility in post-processing to adjust exposure, white balance, colour tones, and other settings without degrading your image quality.
Understanding these technical aspects of your gear will significantly improve your wildlife photography. Although it may seem like a lot to take in when you’re just starting out, with practice you'll quickly become adept at making adjustments as and when they’re required.
Get to know your subject
Beyond technical skills, understanding your subject’s behaviour and habitat will increase your ability to capture compelling images. The more you know about the animals you’re photographing and their behaviour or habits, the better your chances of getting a great shot. Start by observing quietly, and let the wildlife come to you. And remember, you don’t always have to go far afield to capture an interesting photo. For example, I took the image below in my back garden here in Prague in the Czech Republic.
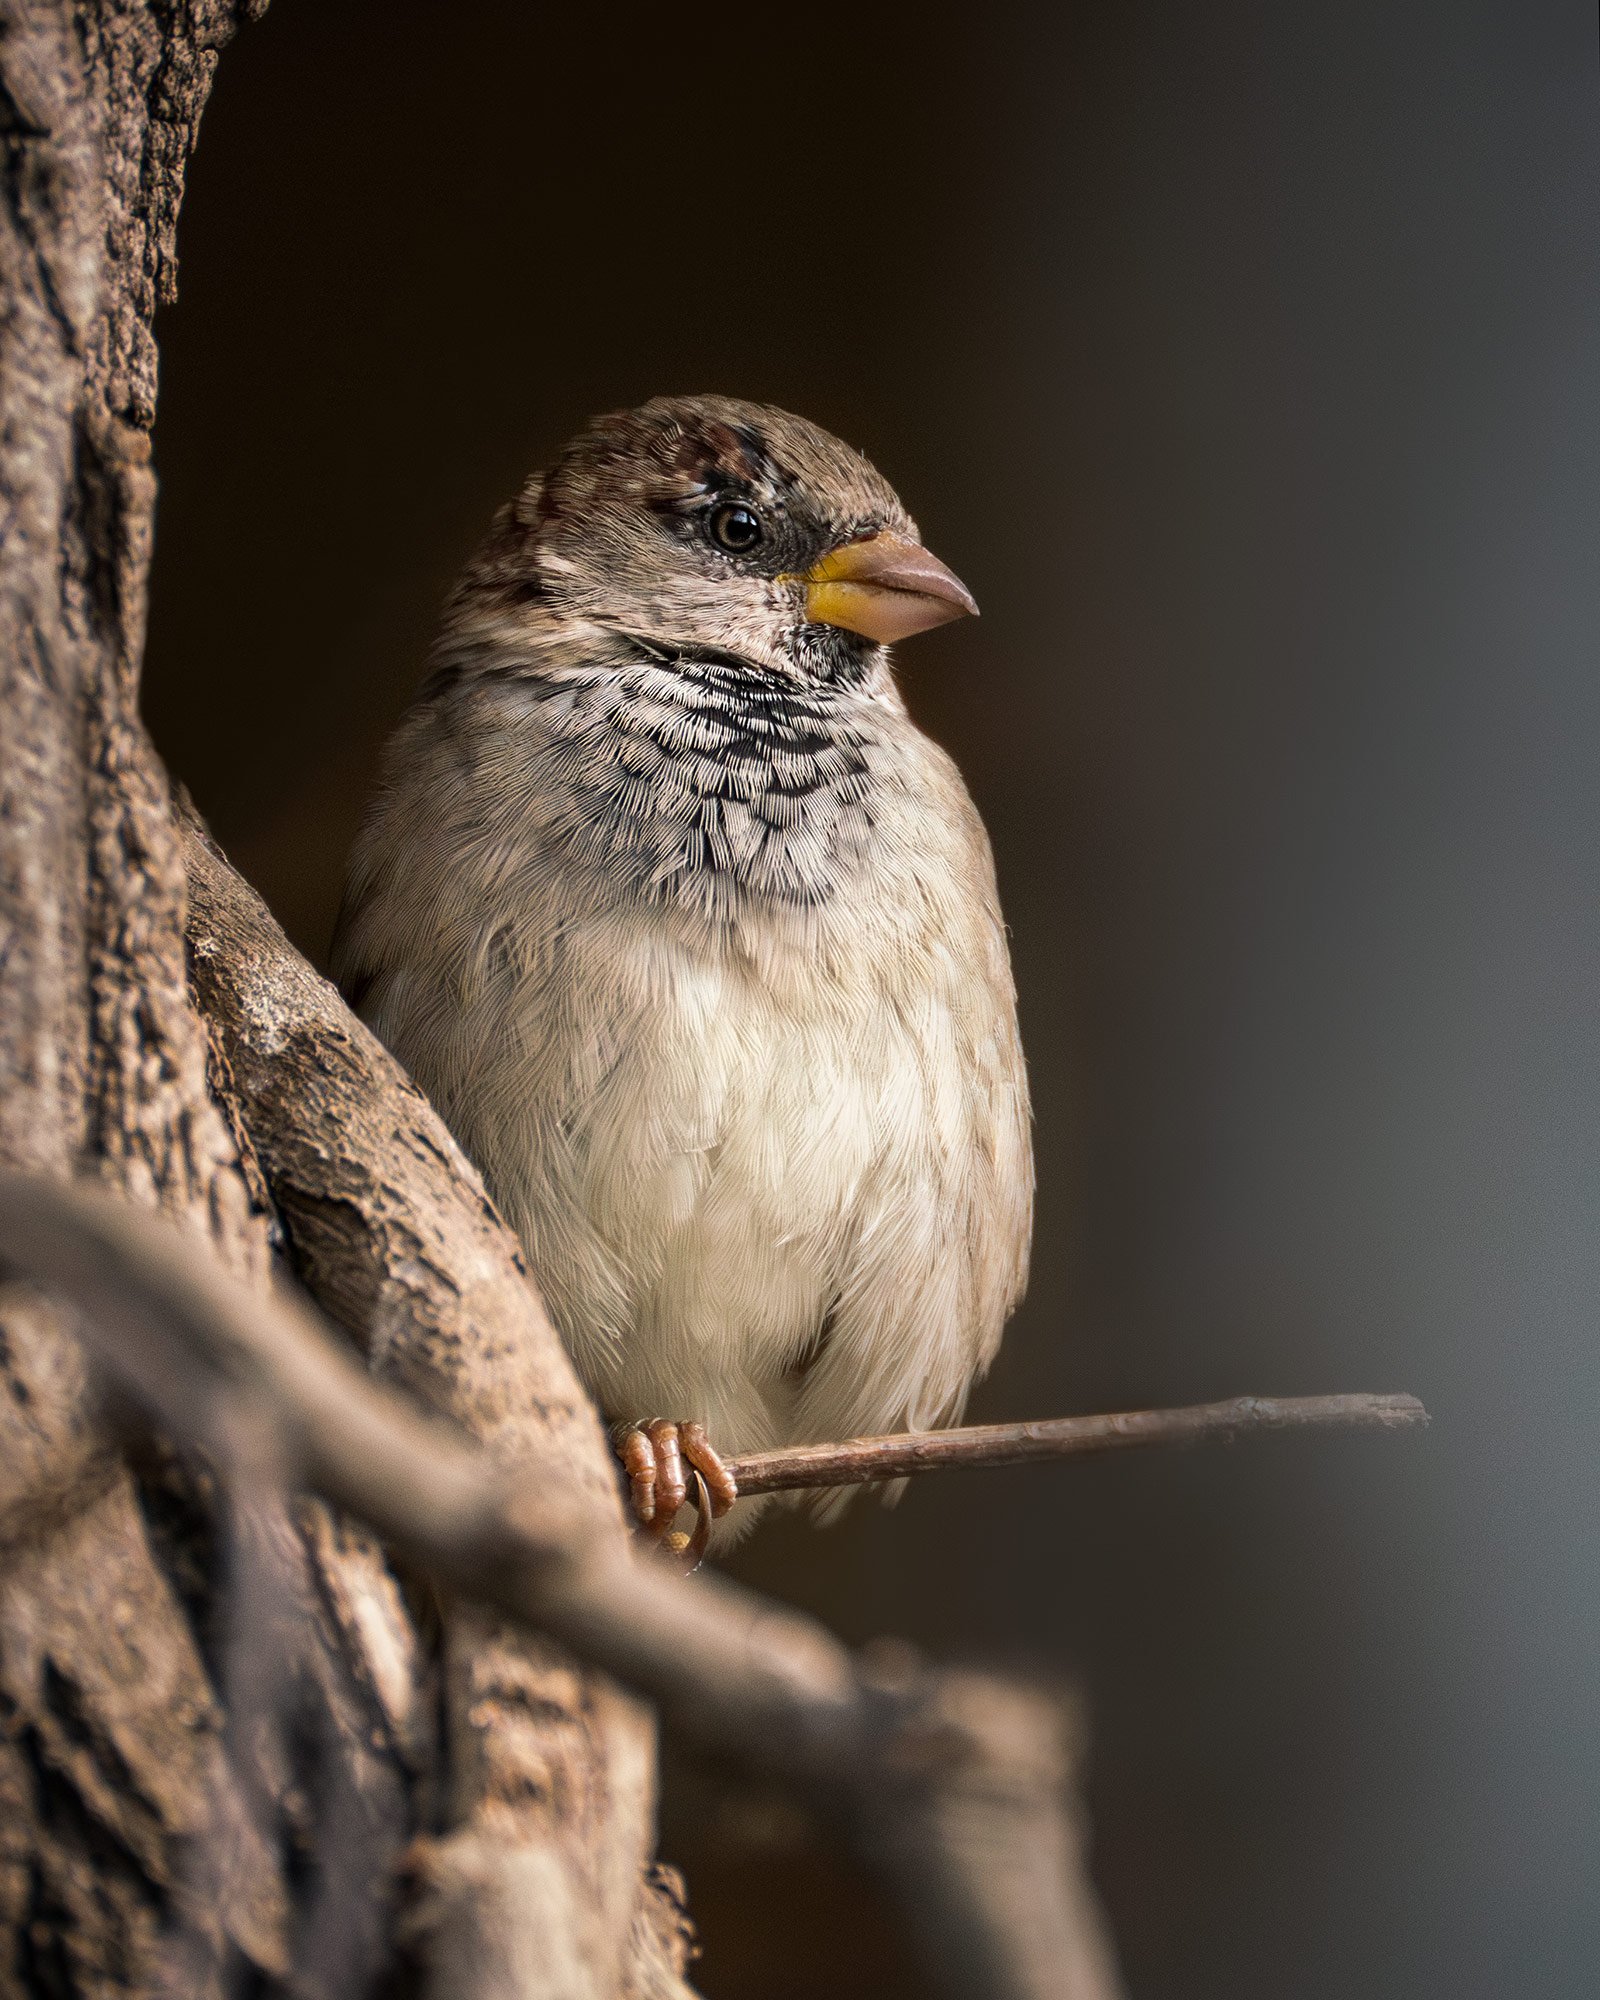
A house sparrow perched at its roosting site, Prague, Czech Republic. Photograph: Matt Garnett, 2023
Patience and presence
Patience in wildlife photography isn't just about waiting—it's about embracing the tranquility of the natural world and fully engaging with the environment around you. Often, the most striking wildlife images are the result of hours, sometimes days, of patient observation. Not every outing will result in a successful photograph, but the next great photo opportunity is always just around the corner. Be there for the ride, and you’ll be surprised at how many unexpected surpises come your way, not to mention the positive affect that observing wildlife can have on our mental well-being.
Experiment with composition
Successful wildlife photography often involves more than capturing the subject; it's also about crafting a visually compelling composition that tells a story. Here are some popular techniques to consider:
Rule of thirds: Dividing the frame into a grid and placing the subject along these lines or at their intersections creates balance and guides the viewer’s eye naturally through the image. This technique helps to create dynamic and interesting photos rather than static, centered compositions.
Frame within a frame: Using natural elements like branches, leaves, or even shadows to draw focus to the subject adds depth and context. This technique not only highlights the main subject but also provides a sense of place and environment, making your photo more immersive.
Leading lines: Incorporate natural lines in the environment, such as rivers, trails, or tree branches, to lead the viewer’s eye toward the subject. Leading lines can create a sense of direction and movement, making your image more engaging.
Symmetry and patterns: Look for natural symmetry and repeating patterns in nature. Symmetrical compositions can be very striking, while patterns can add a pleasing rhythm and structure to your photos. Breaking these patterns with your subject can also create a strong visual impact.
Negative space: Don’t be afraid to include large areas of empty space around your subject. Negative space can emphasise the subject, create a sense of scale, and evoke emotions such as isolation or tranquility.
Perspective and angles: Experiment with different perspectives and angles. Shooting from a low angle can make the subject appear larger and more imposing, while a high angle can provide a unique viewpoint and context within the environment. Don’t hesitate to move around and explore various angles to find the most compelling composition.
Background control: Pay attention to the background and ensure it complements rather than distracts from your subject. Using a shallow depth of field to blur the background or positioning yourself to get a clear, contrasting backdrop can make your subject stand out more effectively.
Golden ratio: Similar to the rule of thirds, the golden ratio involves placing the subject and key elements along the lines of a spiral or grid based on the Fibonacci sequence. This technique creates aesthetically pleasing and harmonious compositions and has been used by artists to balance their compositions for many hundreds of years.
Colour and contrast: Utilise colour to enhance your composition. Look for complementary or contrasting colours to make your subject pop. Pay attention to the colour harmony in the scene, and use it to convey mood and focus.
These compositional techniques are guidelines meant to be adapted or even broken. The key is to experiment and find what works best for each unique situation, allowing your creativity and intuition to guide you.

Experiment with different compositional techniques, and remember, there are no hard and fast rules. Photograph: Matt Garnett, 2023
Explore different styles and approaches
Photography is an art form, and exploring various styles and techniques is part of the creative process. Whether it's capturing motion blur, experimenting with depth of field, or trying black and white photography for mood, the key is to remain open to new experiences and continuously evolve your skills. Each new style you explore will add to your capabilities and enhance your artistic expression.
Ethical practices in wildlife photography
The golden rule for wildlife photographers, whether amateur or professional, is prioritising animal safety. The principle is to "do no harm," meaning not disturbing the animals or their habitats. It’s about appreciating the privilege of observing wildlife rather than just getting the perfect shot.
As wildlife photography grows in popularity, I feel it’s important to highlight some of the unethical practices that unfortunately persist in the field, often in the pursuit of Instagram likes or photography competition prizes. These practices not only cause significant distress to animals but also damage the environment and the integrity of the photography community. Here are some common unethical practices which unfortunately do go on:
Baiting and luring: Using bait or lures disrupts the natural behavior and diet of animals, making them dependent on human-provided food.
Disturbing nests and dens: Disturbing nests or dens can cause significant stress, leading to abandonment and death of young animals.
Harassing wildlife: Approaching animals too closely or provoking them can cause stress, energy loss, and habitat abandonment.
Using drones irresponsibly: As a bird photographer, this is one of my personal bugbears. The use of drones can startle and disorient animals, especially birds, disrupting their nesting and feeding patterns.
Habitat destruction: Trampling through sensitive habitats can lead to soil erosion, destruction of plant life, and disturbance of ecosystems.
Flash photography: Using flash can temporarily blind and disorient animals, disrupting their natural behaviours.
Sharing sensitive locations on social media: Publicly sharing locations of rare species can lead to disturbance, habitat destruction, and even increased risk of poaching.
Glue trapping: And yes, this final one is unfortunately as horrific as it sounds, and leads to huge numbers of bird and animal deaths each year.
Some simple steps to help promote ethical wildlife photography
Ethical wildlife photographers emphasise the well-being of animals and the preservation of their natural habitats. Here are some basic principles to follow:
Observe from a distance: Use longer lenses to capture close-up shots without intruding on the animals’ space.
Do not feed wildlife: Allow animals to find their natural food sources and maintain their natural behaviours. In particular, never feed wild birds bread of any kind, it plays havoc with their digestive systems and provides them with no useful nutrition.
Respect breeding seasons: Avoid disturbing nests, dens, or breeding grounds, especially during sensitive times.
Follow local guidelines: Adhere to regulations and guidelines set by parks, reserves, and wildlife organisations.
Be mindful of your footprint: Stay on designated paths, minimise your impact on the environment, and leave no trace of your visit as far as is possible.
By practicing ethical wildlife photography, you contribute to the conservation of wildlife and their habitats. Your images can inspire others to appreciate and protect the natural world, making your photography a powerful tool for positive change.
Above all, enjoy the journey and keep learning!
Your path as a wildlife photographer is one of continuous learning and adaptation. Every day in the field is an opportunity to learn something new, whether you’re adjusting to sudden weather changes, experimenting with different compositions, or studying the fascinating behaviour of your subject.
Local photography locations
A good tip for beginners is to start locally. While exotic locations are obviously appealing, local nature spots offer valuable practice without the need for extensive (or expensive) travel. Remember, a photographer who lives in the Amazon is photographing their local wildlife, so don’t feel like photographing the animals in your immediate vicinity isn’t valuable or of interest to other people. Your own back garden, local parks, nearby bodies of water, and reputable animal sanctuaries can provide incredibly diverse wildlife photography opportunities. These locations allow you to become proficient with your equipment and develop your skills in a familiar environment.
Incorporating wildlife photography into your travel plans
When traveling, integrating wildlife photography can enhance your experience. Research the wildlife native to your destination and plan your schedule around the times when animals are most active. Remember to respect local regulations and environments to ensure that your photography practices remain ethical and sustainable wherever you travel.
Learn from others and draw inspiration
Studying the works of photographers you admire, even from other genres, can give you valuable insights and inspiration. Analysing how they use composition, light, and subject matter can offer new perspectives and ideas for your own work. And while it's beneficial to learn from others, remember that developing a unique personal style that reflects your vision and creativity is what will bring you the most enjoyment.
Making a difference through your photography
As you progress in your wildlife photography journey, your images can do more than capture beautiful moments—they can inspire and educate others about the importance of conserving the natural world. Partnering with conservation organisations or contributing to scientific research are just some ways your photography can have a tangible impact on wildlife and environmental conservation. Through your lens, you have the power to bring about awareness and change, making each photograph you take a contribution to a larger cause.
That’s all for now, and I hope these tips inspire you to grab your camera and venture into the outdoors.